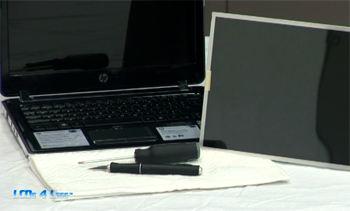
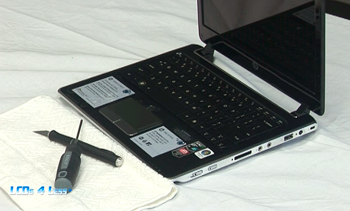
(954) 580-6122
  • Home
  • About
  • Virus Removal
  • Security Cameras
  • Wireless Alarm System
  • Laptop Screens
  • Web Design
  • FAQ
  • Contact


Laptop LCD Removal Instructions

Step 1: Preparation and Identify Parts


  • Make sure your laptop is unplugged and you have removed your battery.
    Locate all screw covers on the display assembly. There are usually at lest 4 scrw covers, and they either be facing you on the diplay assembly or they may be on the side of the display assembly.

    lcd1
    lcd2


  • The following HP Pavilon DV2 model has 2 screw covers at the bottom of the display assembly facing the user..

    lcd1


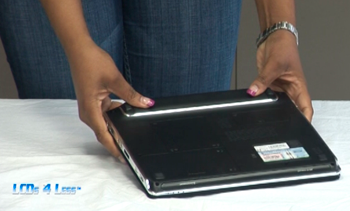
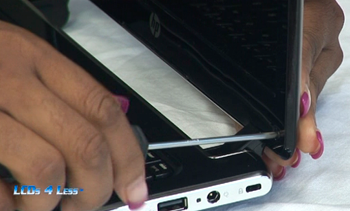
Step 2: Removing Screw Cover


  • Use a knife or some other sharp object like an exacto blade to pick off all the screw covers.
  • Also remove screw covers from side of display assembly if any.

  •  


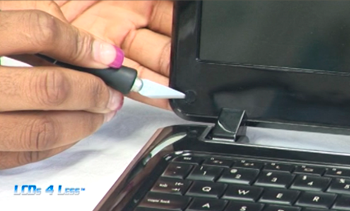
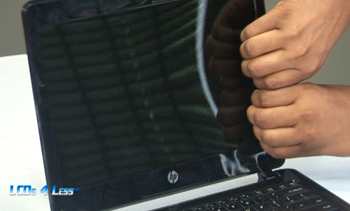
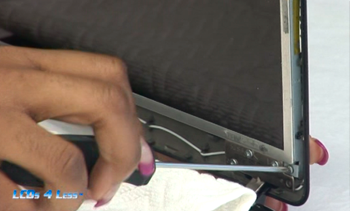
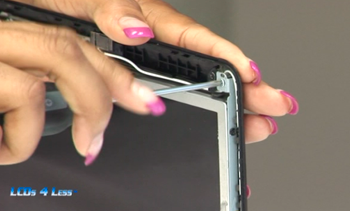
Step 3: Removing the bezel


  • After removing each of the screws, starting at the bottom of the display assembly insert your fingers to unsnap the front bezel. Usually it will snap off easily. If the front bezel does not snap off easily, work the plastic in different directions until it unsnaps.
  • After unsnapping the front bezel from the bottom of the display assembly work your fingers around the other sides. When you have worked your fingers around the display assembly to where the latch is located, you may have to slide the latch in order to detach the bezel.


  • View of display assembly after front plastic bezel has been removed.


  • Tilt the LCD screen forward. If you are unable to tilt the LCD screen forward, you may have to remove the screws from an internal bracket.


  •  


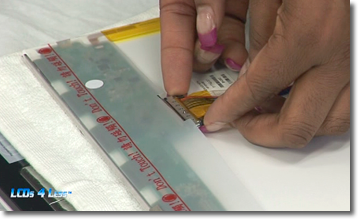
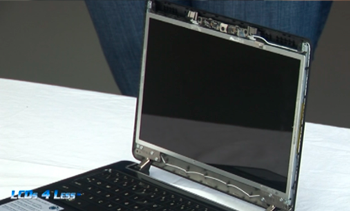
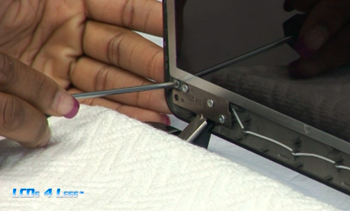
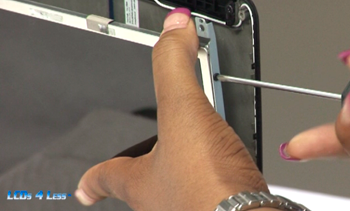
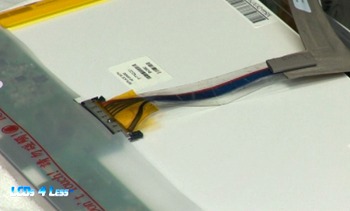
Step 4: Disconnectiong the video cable


  • This is a view of the back of the LCD screen. There will be 2 electronic connections that you will have to disconnect: the video (data) cable and the inverter (power) cable.

  •  

  • Remove tape securing video cable if any. Some HP notebook models will not use tape; instead will have clips on eighter side of the video cable which you will have to press inwards to release.
  • Slide video cable out. It's preferable that you use your finger nails instead of pulling on the video cable.

  •  


  • You have now completely uninstalled your LCD screen.


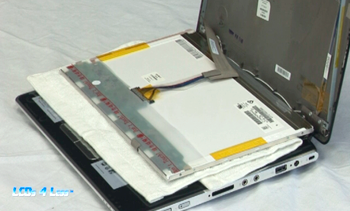
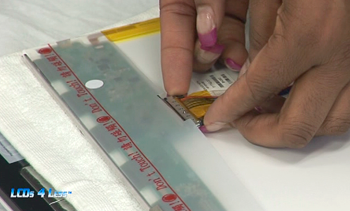
Step 5: Install your new screen


  • You can now reverse the process to install the new screen.


Like what you see?

We're confident we can help you too!

Schedule a Free Consultation

About Us

Computer Guy U.S offer a variety of residential and business services to meet our customers' needs. All of our tech experts are certified, reliable and can help you with the following services online, in-store or by phone.

Servicing: LOCAL Area: Boca Raton, Delray, Parkland, Coral Springs, Margate, Tamarac, Pompano Beach, North Lauderdale, Sunrise, Plantation, Davie, Hollywood, North Miami.

Services & Solutions

  • Laptop Screens
  • LCD Repair
  • Virus Removal
  • Diagnosis & Repair
  • Surveillance Systems
  • Wireless Alarm System
  • Camera Installation
  • Web Design
  • Computers
  • Terms and Conditions
  • TV Box
  • Square
© 2016 computerguyus.com
All Rights Reserved.
  • Privacy Policy
  • Terms Of Use

Bluce Corp. Coral Springs FL | 954-580-6122